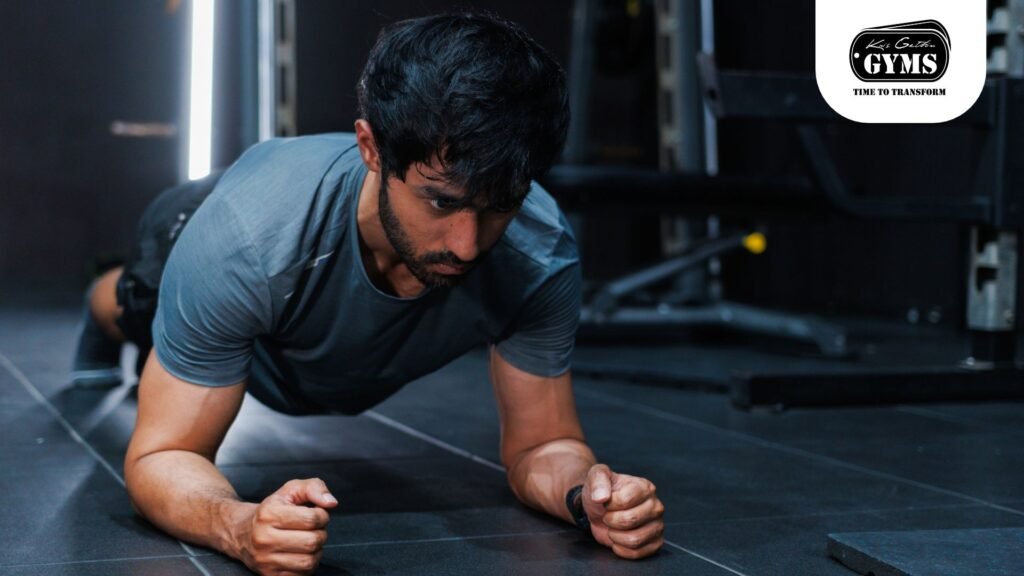
Watch someone hold a plank for two full minutes, and you will usually see the same thing by the one-minute mark. The hips have sagged. The lower back has arched. The shoulders have sunk between the arms. The clock is still running, but the core stopped working a long time ago.
Our coaches at KRIS GETHIN GYMS see this every week. Most people treat the plank as a waiting game, and the number on the stopwatch becomes the goal.
The plank is better understood as a full-body isometric contraction. Done with real tension, 20 seconds can demand more from the core than two minutes of hanging on your joints.
Why Short, Tense Planks Beat Long, Passive Ones
The main job of your front core, the rectus abdominis, transversus abdominis, and obliques, is not to bend your spine. It is to stop your lower back from arching under load. That is called anti-extension, and it is exactly what your core does during squats, deadlifts, and overhead presses.
Spine researcher Dr Stuart McGill’s work shapes how many coaches think about this. Once the abdominals tire, around the 30 to 45 second mark for many people, the body quietly hands the load to other structures. The pelvis tips forward, the lower back arches, and your weight starts hanging on passive spinal ligaments and the hip flexors. Tension in the abs drops while compression in the lumbar spine rises. You are still “planking”, but the exercise has changed.
Studies of the more active version, often called the RKC plank, point the same way. Squeezing the glutes, quads, and lats hard while pulling the elbows toward the toes has been reported to raise activation of the rectus abdominis and external obliques by more than 100% compared with a relaxed plank. Because every muscle is firing at once, fatigue arrives in roughly 15 to 30 seconds. That is the point. High tension for a short time teaches the core to brace.
Set Up A Plank From The Ground Up
Do not drop to the floor and hope for the best. Build the position in this order.
1. Elbows and forearms. Place your forearms flat on the floor with the elbows directly under your shoulders. Keep the forearms parallel, like train tracks, instead of clasping your hands. Clasped hands tend to rotate the shoulders inward and round the upper back.
2. Shoulder blades. Press the forearms firmly into the floor so the shoulder blades spread slightly and the chest does not sink between the arms. Then imagine dragging your elbows back toward your feet without moving them. That switches on the lats and locks your ribcage down.
3. Legs. Extend the legs straight behind you with the feet together, or hip-width apart if you need balance. Squeeze the quads hard enough to pull the kneecaps up. Soft knees leak tension.
4. Pelvic tilt. This is where most people fail. Squeeze the glutes and tuck the tailbone slightly under, as if drawing your pubic bone toward your lower ribs. This posterior tilt flattens the lower back, quietens overactive hip flexors, and makes the abs carry the load.
5. Head and neck. Look at the floor between your thumbs. Do not crane forward to watch a mirror, and do not let the head drop. Ears, shoulders, hips, knees, and ankles should sit on one straight line.
6. Breathing. Never hold your breath. Take short, controlled breaths into the sides of the ribcage while keeping the abdominal wall braced, as if you expected a light punch.
Five Form Errors That Take The Work Away From Your Core
If you feel a plank in your lower back or shoulders and not in your midsection, one of these is usually the cause.
| Form Error | What Goes Wrong | Fix |
|---|
| Hip sag (anterior pelvic tilt) | Glutes switch off, the lower back arches, and the joints at the back of the spine compress | Squeeze the glutes and tuck the tailbone before lifting off the floor |
| Hips too high (pike) | Hip flexors take over and the lever shortens, reducing core tension | Lower the hips until ears, shoulders, hips, and ankles form a line |
| Shoulder collapse | The serratus anterior disengages and the chest sinks between the arms | Push the elbows through the floor to widen the upper back |
| Clasped hands | Pulls the shoulders inward and encourages forward head posture | Keep forearms parallel, palms flat or thumbs up |
| Passive waiting | Muscles work at a low level just to survive the timer, so there is little strength adaptation | Pull elbows toward toes and toes toward elbows to create maximal tension |
Progress The Plank Without Adding Minutes
Once you can hold a full-tension plank for 30 strict seconds without shaking out of position or losing the pelvic tilt, holding it for three minutes is wasted time. Make it harder instead.
- Level 1 : Incline plank. Place the forearms on a bench or box, around 30 to 45 degrees. Do 3 sets of 20 to 30 seconds with 45 seconds of rest. Move on when you have no lower back arch and strong glute engagement across all three sets.
- Level 2 : Standard floor plank with full tension. Forearms on the floor, feet together, glutes, quads, and lats braced hard, with that elbow-to-toe pull. Do 4 sets of 20 seconds with 40 seconds of rest. Move on when you can hold the full tension, including a light tremor from effort rather than fatigue, without the hips sagging.
- Level 3 : Long-lever plank. Walk the elbows 4 to 6 inches forward of the shoulders while keeping the pelvic tilt. A longer lever increases the demand on the front core considerably. Do 4 sets of 15 to 20 seconds with 45 seconds of rest.
- Level 4 : Stir-the-pot. Forearms on a stability ball in a rigid plank, then trace small circles with the elbows while the torso stays still. Do 3 sets of 8 circles each way with 60 seconds of rest.
Why 20 Seconds Works
Short sets suit the way the trunk is actually used. Very long isometric holds can restrict local blood flow in deep trunk muscles, and form tends to break down as fatigue builds. Brief bouts of 10 to 20 seconds, separated by 30 to 45 seconds of rest, let your energy stores replenish so every second is performed with clean alignment.
The carryover to the barbell is also better. Nobody squats or deadlifts for two minutes straight. Heavy lifts ask for a few seconds of hard abdominal bracing, and training the plank in crisp bursts builds that exact skill.
A Four-Point Standard For Your Next Session
- Cap sets at 20 to 30 seconds. If you pass 30 seconds easily, you are not squeezing hard enough.
- Create tension. Try to drag your elbows toward your toes and your toes toward your elbows. Nothing moves, and your abs will light up.
- End the set at the first form break. The moment the lower back arches or the glutes relax, stop. Do not log sloppy time.
- Train it often, not long. Three to four quality sets, three to four times a week, at the start of a warm-up or the end of a session, is plenty.
This is the standard we hold at KRIS GETHIN GYMS, where intensity is measured by mechanical tension and technique, not by time on a clock.
If you have lower back pain, shoulder problems, or a recent injury, ask a qualified coach or physiotherapist to check your setup before you start.